
We got this fancy new category in the National Cyber League (NCL) Fall 2020 Season that surprised quite a few people, myself included. Forensics! But, what tools do we need to work through the challenges in this category? Well, there are several tools in your arsenal already for this topic which are dependent on what the actual challenge is. For example, for redacted content in documents, a simple copy and paste into some other editor will usually pull it out.
What about some of the more complicated challenges that can’t be solved by just using OSINT or copy/pasta, though?
Autopsy is an open source digital forensics platform that allows you to recover deleted files, look for evidence, and, most importantly, tag and document what you’ve found for other investigators. It allows for reports to be generated so that your results can be presented to the appropriate people, whether you are preparing those reports for law enforcement or as evidence for a court event, or even just for your boss at that awesome new cyber security role you just landed.
What I’ve written is just the beginning. If you ever have the opportunity to get the free training that they offer on occasion, I highly recommend signing up and participating in it. This is especially true if you are interested in digital forensics and incident response. I often visit DFIR Diva, and that is where I initially found the Autopsy software as well as the training.
It is extremely important to note that the purpose of digital forensics is to analyze the artifacts as they are and to document what you find so that if it is needed by law enforcement or a court, it can be used to solve cases. That being said, when you analyze information using Autopsy, there is a handy little feature to generate reports. It also has the capability of tagging interesting items so that if another person needs to see it, or if you need to review it, or if you are working on something entirely different but there is a correlation to another case, the information is right there, as it supports two central repository deployments: SQLite & PostgreSQL. For the purpose of NCL challenges you most likely will not use this. SQLite is for individual users when the information doesn’t need to be shared but you need to reference or cross-reference it, while PostgreSQL is stored on a server for multiple users to share the database.
Let’s begin by installing Autopsy from their website onto a virtual machine (VM), and, for the purposes of this walk-through, I will use the Windows 64-bit version. After we get it installed, we’ll open it up and be presented with this screen:

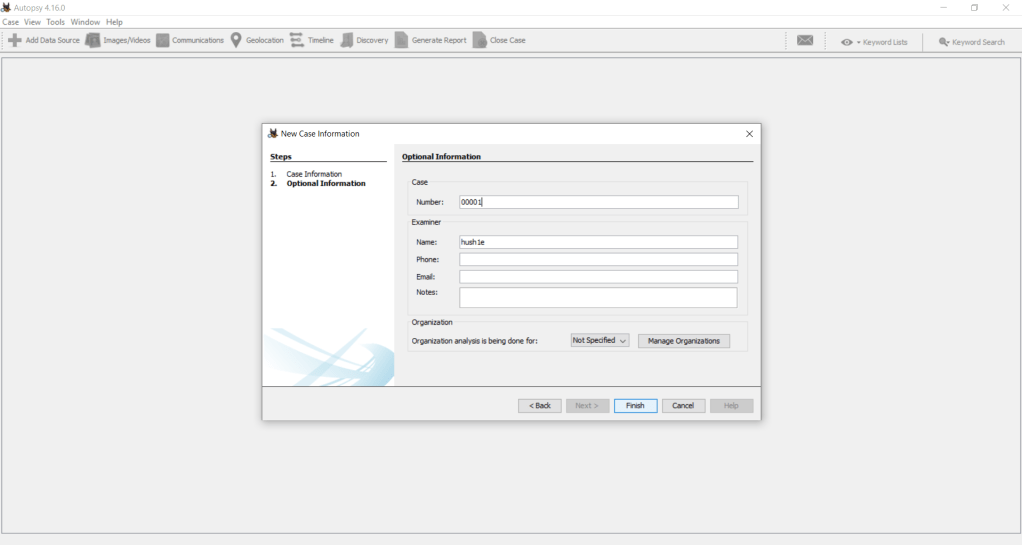
Here, since we’re beginning a new case, we’ll choose New Case and be presented with a screen to assign a case number. For the purposes of this walk-through, I used 0001. This will bring us to the main screen, and from here we need to Add a Data Source to analyze. For this I’m using a publicly available drive image, and we’ll click next to bring us to the ingest modules that we wish to use on the disk image:
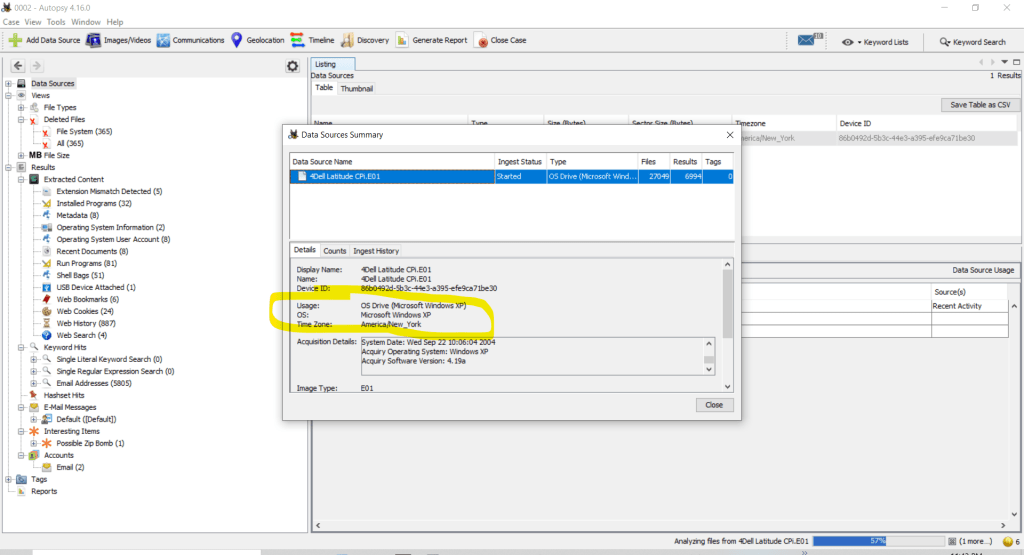
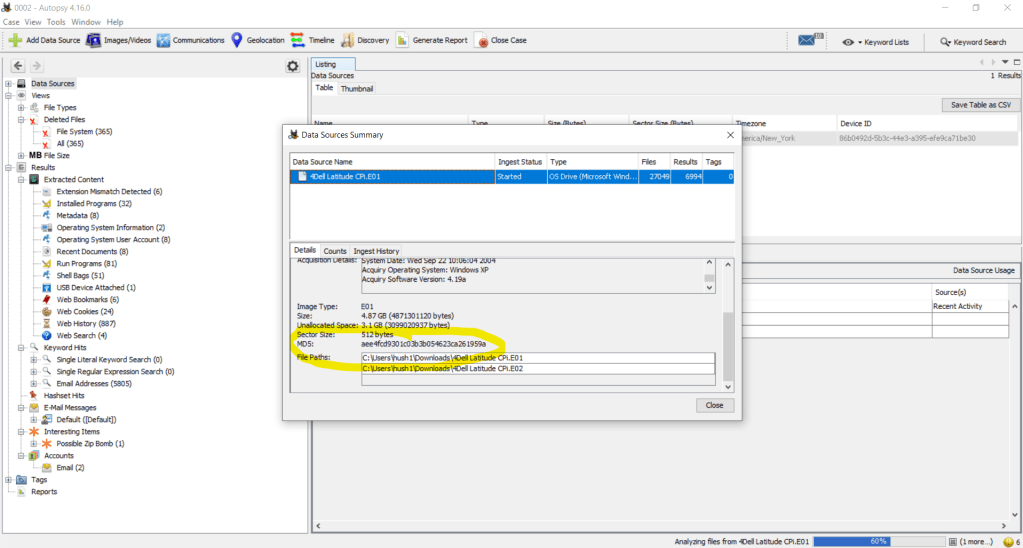
Let’s find the md5 of the image and the operating system. We can do this by looking at the Data Sources Summary:
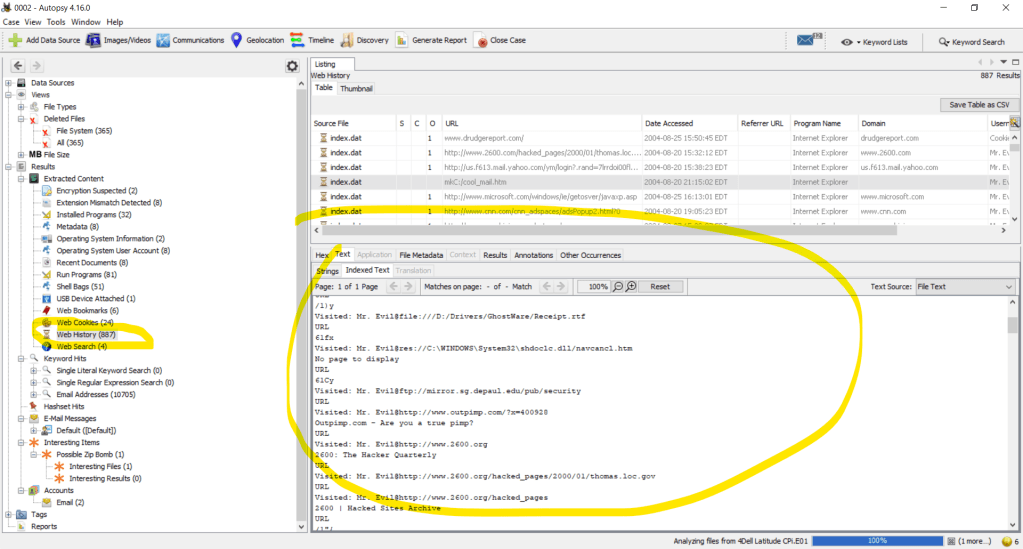
We can also find quite a bit of other important information. For example, on this disk image, Mr. Evil appears to have done some interesting things. We can see this by looking at the information that was extracted from the ingest modules on the left-hand side of the window:
Another interesting thing that we can do is check out the Timeline for events that stick out to us:

In an earlier article, I told y’all about volunteering. In that volunteering spree over last summer, I attended an absurd amount of virtual conferences and hands-on workshops. Among those was an amazing presentation for Autopsy. During this presentation, there was a contest for user-submitted ingest modules! I adore the creative minds at work in this community and the effectiveness of some of the modules that were submitted.
What about items like registry keys, documents, finding the operating system, finding Nemo, finding where Hoffa’s buried… OK, maybe not the last two. We can extract artifacts from the data, which is why you should be doing this in a VM, because I’m not sure if you noticed but this image had a zip bomb in it. While this is a learning image, you really don’t want to run live malware or time bombs on your host. I like living dangerously, but who has the time to reinstall when you could have avoided it by using a virtual machine?
The files used in this article are publicly available courtesy of the NIST CFReDS Project to help aid in learning forensics.
This does not even begin to scrape the surface of the information that you can obtain in forensics, so be on the lookout for more from my teammates!
See you in the Game and forever stalking Slack ~ Hush1e

One thought on “Digging into Autopsy (Forensics)”